


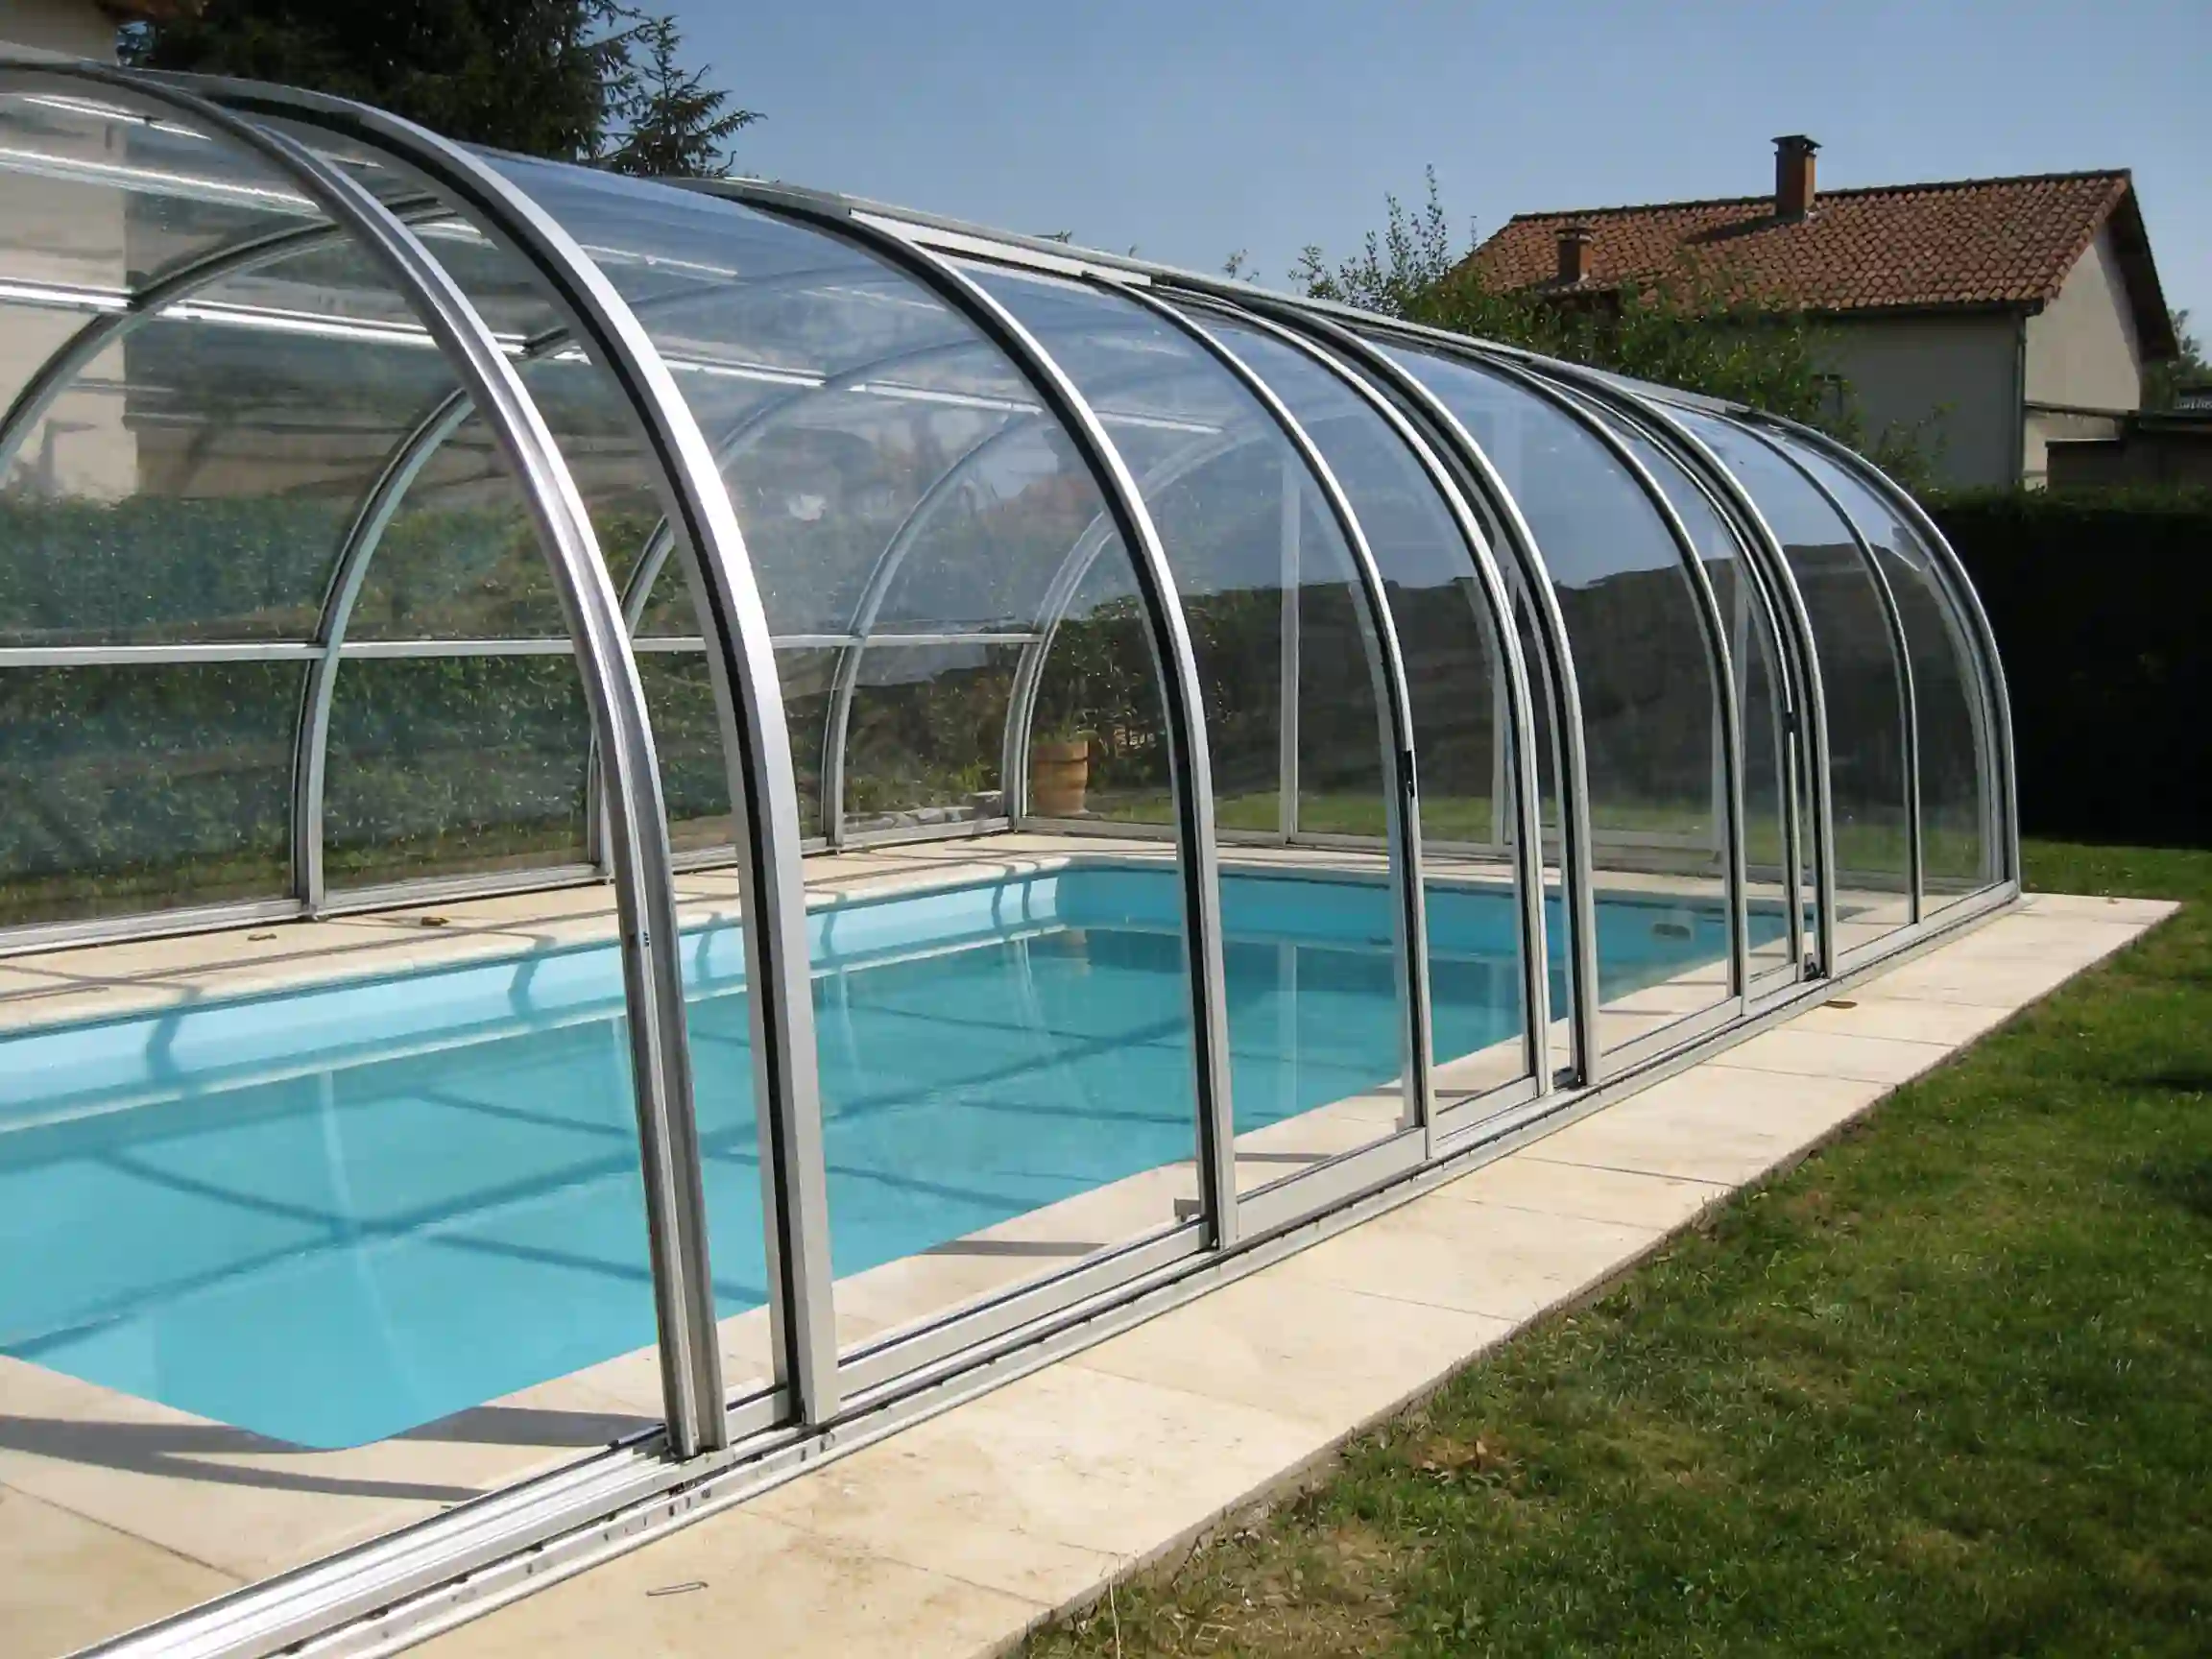
Руководство по монтажу навеса для бассейна: обследование места установки, фундамент, сборка и сдача объекта
Установка навеса над бассейном представляет собой четко организованный процесс, который включает в себя обследование участка, проведение измерений, подготовку фундамента, сборку алюминиевого каркаса, монтаж панелей, регулировку направляющих, герметизацию, проверку водоотвода и окончательную сдачу объекта.
Для владельцев частных домов, гостиниц, курортов и коммерческих проектов по строительству бассейнов правильный монтаж имеет решающее значение для обеспечения долгосрочной безопасности, бесперебойной эксплуатации и защиты от погодных воздействий. Качественно установленное остекление бассейна помогает защитить его от дождя, ветра, листьев, пыли и сезонных перепадов температуры, а также повышает удобство использования бассейна в течение всего года.
Компания Sunrim занимается проектированием и производством изготовленных на заказ выдвижных навесов для бассейнов, солнечных террас у бассейнов, выдвижных солнечных террас и систем наружных ограждений для жилых и коммерческих объектов по всему миру.
В данном руководстве шаг за шагом описан процесс монтажа навеса для бассейна, в том числе что необходимо подготовить перед монтажом, как собирается конструкция и какие детали следует проверить перед окончательной сдачей объекта.
Краткий ответ: Каковы основные этапы монтажа навеса над бассейном?
Основные этапы монтажа навеса для бассейна включают обследование участка, проверку размеров, подготовку фундамента или грунта, сборку алюминиевого каркаса, монтаж направляющих, установку стеклянных или поликарбонатных панелей, регулировку роликовых и раздвижных систем, герметизацию, проверку водоотвода, проверку безопасности и окончательную сдачу объекта.
В случае выдвижного навеса для бассейна необходимо тщательно проверить выравнивание направляющих, регулировку роликов и ход панелей, чтобы убедиться в плавном открывании и закрывании навеса.
Перед началом монтажа заказчик проекта должен подготовить точные размеры бассейна, фотографии участка, информацию о состоянии грунта, направлении отвода воды, требованиях, обусловленных местными климатическими условиями, а также сведения о подъезде.
Если вы все еще сравниваете типы корпусов и бюджеты, вы также можете ознакомиться с материалами компании Sunrim Руководство по стоимости остекления бассейна.
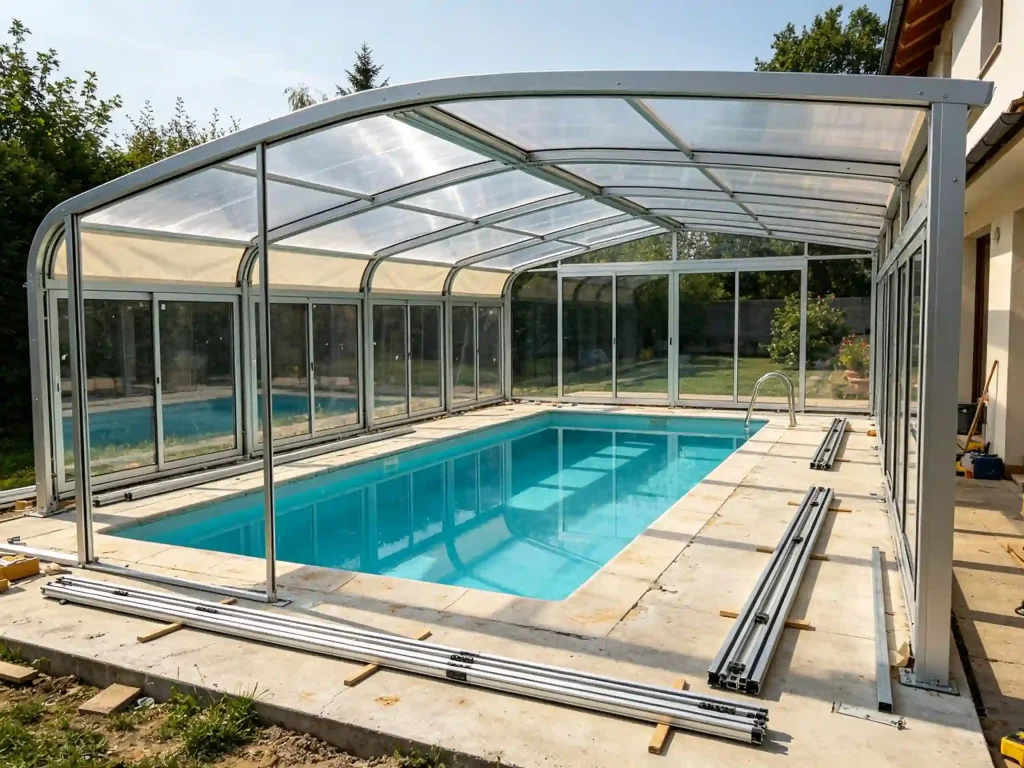
Почему так важна правильная установка навеса над бассейном
Навес для бассейна — это не просто покрытие. Это конструктивная система, которая может включать алюминиевые каркасы, прозрачные панели, направляющие для раздвижных элементов, ролики, уплотнители, замки, дренажные элементы, а иногда и моторизованные компоненты.
Неправильная установка может привести к следующим проблемам:
- Трудное скользящее движение
- Утечка воды
- Плохой водоотвод
- Несоосность рамы
- Вибрация панели
- Отслеживание деформации
- Воздушные зазоры
- Сниженное сопротивление ветру
- Более короткий срок службы
- Риски для безопасности при эксплуатации
В случае раздвижных навесов для бассейнов качество монтажа напрямую влияет на плавность открывания и закрывания навеса.
Профессиональный монтаж навеса над бассейном позволяет обеспечить:
- Устойчивая конструкция
- Точная центровка
- Лучшая защита от непогоды
- Более безопасная повседневная эксплуатация
- Более длительный срок службы изделия
- Более низкое рабочее давление
- Повышение качества обслуживания клиентов
Этап 1: Обследование объекта и оценка проекта
Первым этапом монтажа навеса над бассейном является обследование участка.
Перед началом производства или монтажа производитель или проектная группа должны ознакомиться с фактическими условиями на объекте. Это поможет убедиться в том, подходит ли выбранный тип ограждения для территории вокруг бассейна.
В ходе обследования объекта обычно проверяются:
- Длина бассейна
- Ширина бассейна
- Ширина палубы
- Первый этаж
- Доступное место для установки
- Ограждающие стены или заборы
- Направление отвода воды
- Имеющееся оборудование для бассейна
- Маршрут доставки материалов
- Находящиеся поблизости здания или деревья
- Воздействие ветра
- Местные климатические условия
На этом этапе фотографии и видеоматериалы оказываются весьма полезными, особенно в случае международных проектов, когда представитель производителя не всегда может лично посетить объект.
В рамках международных проектов компания Sunrim может предоставить рекомендации по проведению измерений и техническую документацию, чтобы помочь заказчикам подготовить точную информацию по монтажу.
Шаг 2: Уточните тип ограждения бассейна
Различные типы навесов для бассейнов требуют разных способов монтажа.
К распространенным типам ограждений для бассейнов относятся:
- Низкопрофильные навесы для бассейнов
- Навесы для бассейнов средней высоты
- Высокие ограждения для бассейнов
- Раздвижные навесы для бассейнов
- Стационарные навесы для бассейнов
- Телескопичные навесы для бассейнов
- Остекление солнечных террас у бассейна
- Навесы для бассейнов типа «Lean-to»
Низкопрофильное ограждение может потребовать меньшего вертикального зазора, но более точного выравнивания направляющих. Для высокого ограждения бассейна может потребоваться более прочная несущая конструкция. Устанавливаемое ограждение бассейна требует тщательной установки направляющих и регулировки роликов.
Если бассейн расположен рядом с домом, стеной отеля или коммерческим зданием, можно также рассмотреть вариант сооружения пристройки или солнечной веранды для бассейна.
Связанные проекты бассейнов, сочетающих внутреннее и наружное пространство, см. в руководстве Sunrim по Остекление бассейнов: стекло или поликарбонат чтобы сравнить варианты материалов для панелей.
Шаг 3: Проверка состояния фундамента и грунта
Подготовка фундамента — один из важнейших этапов монтажа навеса над бассейном.
Конструкция должна быть установлена на устойчивой, ровной и прочной поверхности. Если грунт неровный или нестабильный, рельсы со временем могут сместиться, что приведет к проблемам с движением.
К типичным вариантам фундаментов относятся:
- Бетонная палуба
- Железобетонный фундамент
- Поверхность из камня или плитки на бетонном основании
- Конструктивная платформа
- Существующая терраса у бассейна после укрепления
Перед установкой убедитесь, что заземление:
- Уровень
- Достаточно прочный
- Без трещин
- С надлежащим водоотводом
- Достаточно широкий для рельсов
- Подходит для анкерного крепления
- Стабильный при сезонных колебаниях
В случае раздвижных навесов для бассейнов обе стороны направляющей должны быть точно выровнены. Даже небольшие перепады высоты могут повлиять на качество скольжения.
Шаг 4: Подготовка инструментов и компонентов для установки
Перед началом установки необходимо проверить и подготовить все компоненты.
К типичным элементам ограждения для бассейна относятся:
- Алюминиевые профили для каркасов
- Прозрачные панели для крыши и стен
- Направляющие
- Ролики
- Крепежные детали
- Уплотнения
- Концевые упоры
- Фиксирующие детали
- Фитинги для дренажа
- Угловые соединители
- Монтажные кронштейны
- Дополнительные компоненты с электроприводом
К инструментам для установки могут относиться:
- Рулетка
- Лазерный нивелир
- Электрическая дрель
- Отвертки
- Гаечные ключи
- Резиновый молоток
- Инструменты для герметиков
- Подъемное оборудование
- Защитные перчатки
- Защитные прокладки
- Инструменты для выравнивания
Для установки более крупных корпусов может потребоваться подъемное оборудование и несколько монтажников.
Контрольный список компонентов помогает избежать пропусков деталей и сокращает задержки при монтаже.
Шаг 5: Обозначьте место установки
После проверки фундамента монтажная бригада размечает точное местоположение ограждающей конструкции.
Сюда входят:
- Положение на трассе
- Точки соединения рамы
- Опорные точки
- Направление открытия
- Конечная позиция упора
- Положение двери или прохода
- Направление отвода воды
Точная разметка особенно важна при монтаже раздвижной конструкции для бассейна. Если направляющие не расположены параллельно, конструкция может не скользить плавно.
Рекомендуемые проверки включают:
- Измерить диагонали
- Подтвердить параллельность линий трассы
- Осмотрите обе стороны террасы у бассейна
- Убедитесь, что для перемещения имеется достаточно свободного пространства
- Не допускайте соприкосновения с лестницами, чехлами или оборудованием бассейна
С этим этапом не следует торопиться.
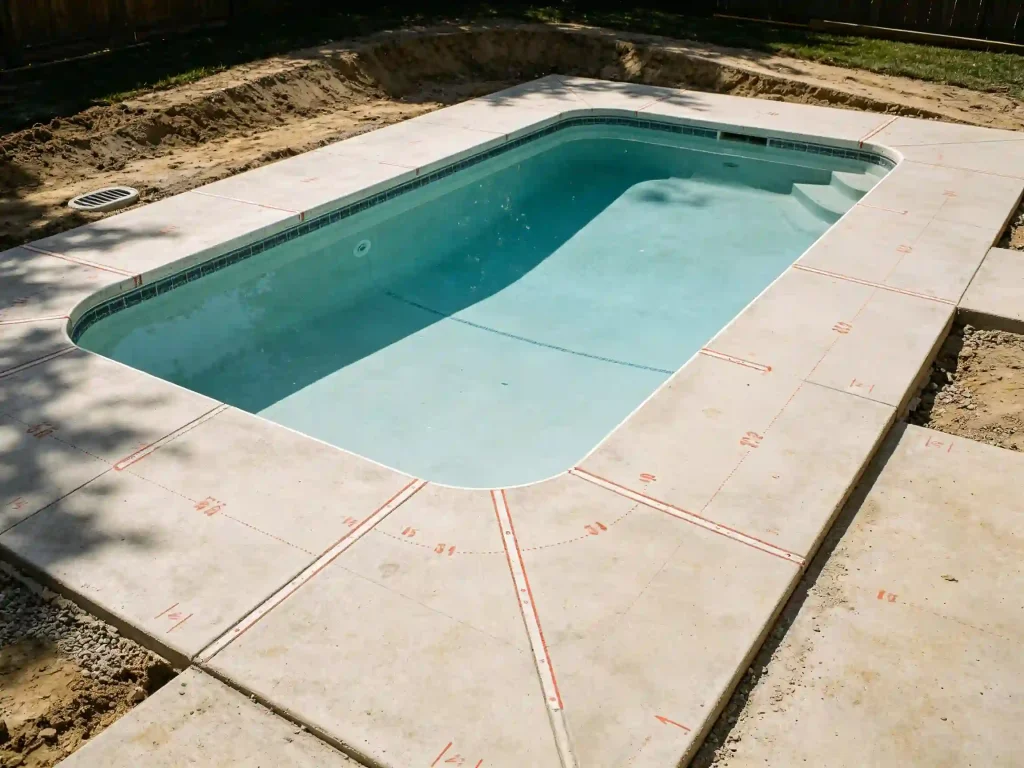
Шаг 6: Установите направляющие для раздвижных дверей
При монтаже раздвижных навесов для бассейнов установка направляющих является одним из самых важных этапов.
Треки должны соответствовать следующим требованиям:
- Прямой
- Параллельный
- Уровень
- Надежно закрепленный
- С соблюдением надлежащих интервалов
- Чистый и без мусора
Установка рельсов обычно включает в себя:
- Расположение рельсов
- Сверление отверстий для анкеров
- Крепление рельсов к фундаменту
- Проверка выравнивания
- Проверка длины трассы
- Очистка поверхности трассы
- Проверка движения роликов
Если корпус состоит из нескольких телескопических секций, каждая из них должна свободно перемещаться по направляющей.
Неправильная установка гусениц может привести к шуму, трению, нагрузке на раму и затруднениям в эксплуатации.
Шаг 7: Сборка алюминиевой рамы
После монтажа направляющей можно приступить к сборке алюминиевых профилей рамы.
В комплект обычно входят:
- Базовые профили
- Боковые столбы
- Изогнутые или прямые кровельные балки
- Поперечные балки
- Крайние кадры
- Дверные коробки
- Соединительные пластины
- Армирующие элементы
При сборке каркаса монтажникам следует проверить:
- Направление профиля
- Плотность затяжки винтов
- Прямоугольность рамы
- Точность соединения
- Защита поверхности
- Выравнивание пазов панелей
- Положение открытия двери
С алюминиевыми рамами следует обращаться осторожно, чтобы избежать появления царапин и деформации.
В случае коммерческих или крупных навесов для бассейнов может потребоваться поэтапная сборка и подъем каркаса.
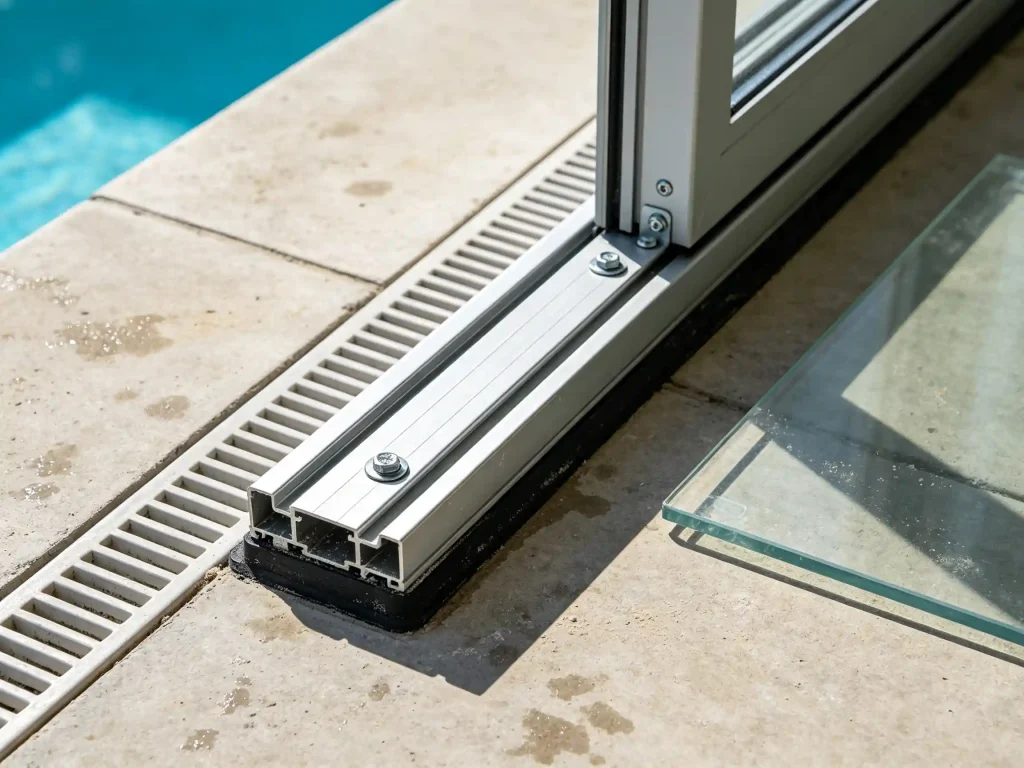
Шаг 8: Установка стеклянных или поликарбонатных панелей
После сборки каркаса в него устанавливаются прозрачные панели.
В конструкциях навесов для бассейнов обычно используются поликарбонатные панели, поскольку они легкие, ударопрочные и подходят для изготовления больших подвижных секций. В некоторых моделях навесов премиум-класса или в конструкциях с фиксированными навесами может также использоваться стекло.
При монтаже панелей необходимо проверить:
- Размер панели
- Ориентация панели
- Направление нанесения защитной пленки
- Герметизация кромок
- Деформационные зазоры
- Способ крепления
- Направление потока воды
- Царапины на поверхности
- Сторона с УФ-защитой (если имеется)
Поликарбонатные панели могут расширяться и сжиматься при изменении температуры, поэтому следует предусмотреть соответствующий зазор.
Правильность монтажа панелей влияет не только на внешний вид, но и на защиту от погодных воздействий, а также на долговечность конструкции.
Шаг 9: Регулировка роликов и хода
Для убирающегося навеса над бассейном регулировка роликов имеет решающее значение.
После установки каждой секции ограждения на рельсы монтажная бригада должна проверить его движение.
К важным проверкам относятся:
- Плавный ход
- Одинаковое перемещение с обеих сторон
- Отсутствие заторов на трассе
- Отсутствие трения рамы
- Отсутствие необычных шумов
- Правильное телескопическое перекрытие
- Надлежащее функционирование концевого выключателя
- Безопасное открытие и закрытие
Если корпус не перемещается плавно, команда должна проверить:
- Выравнивание рельсов
- Положение ролика
- Прямоугольность рамы
- Первый этаж
- Препятствия
- Натяжение крепежа
Правильно отрегулированный выдвижной кожух должен двигаться плавно и предсказуемо.
Шаг 10: Установка уплотнителей, замков и фурнитуры
После сборки основной конструкции монтажная бригада устанавливает уплотнители, замки и фурнитуру.
К ним могут относиться:
- Резиновые уплотнители
- Щетковые уплотнения
- Детали боковой застежки
- Дверные замки
- Концевые упоры
- Предохранительные замки
- Дренажные элементы
- Вентиляционные отверстия
- Люки
- Дополнительные сетки от насекомых
Герметизирующие элементы помогают уменьшить проникновение дождя, образование щелей под воздействием ветра, а также попадание пыли и листьев. Замки и фиксаторы повышают безопасность в повседневной жизни.
При обслуживании укрытий для открытых бассейнов следует регулярно проверять герметичность уплотнений.
Шаг 11: Проверьте дренаж и поток воды
Дренаж играет важную роль в обеспечении нормальной работы навеса над бассейном.
Навес над бассейном не должен задерживать воду вокруг направляющих или конструкции. Недостаточный водоотвод может привести к появлению пятен, риску коррозии, образованию скользких поверхностей и проблемам с техническим обслуживанием.
Монтажная бригада должна проверить:
- Уклон грунта
- Направление выхода воды
- Дренаж трассы
- Расположение водосточной желоба (если применимо)
- Перекрытие уплотнений
- Места скопления воды
- Дренаж близлежащей террасы
- Подключение водосточной трубы или сливного патрубка (при необходимости)
Если проект реализуется в дождливом или снежном регионе, планирование дренажа приобретает еще большее значение.
При реализации проектов в зимних условиях или в снежных регионах вам также может быть полезно сопоставить требования к конструкции навесов с материалами компании Sunrim, посвященными зимним навесам для бассейнов.
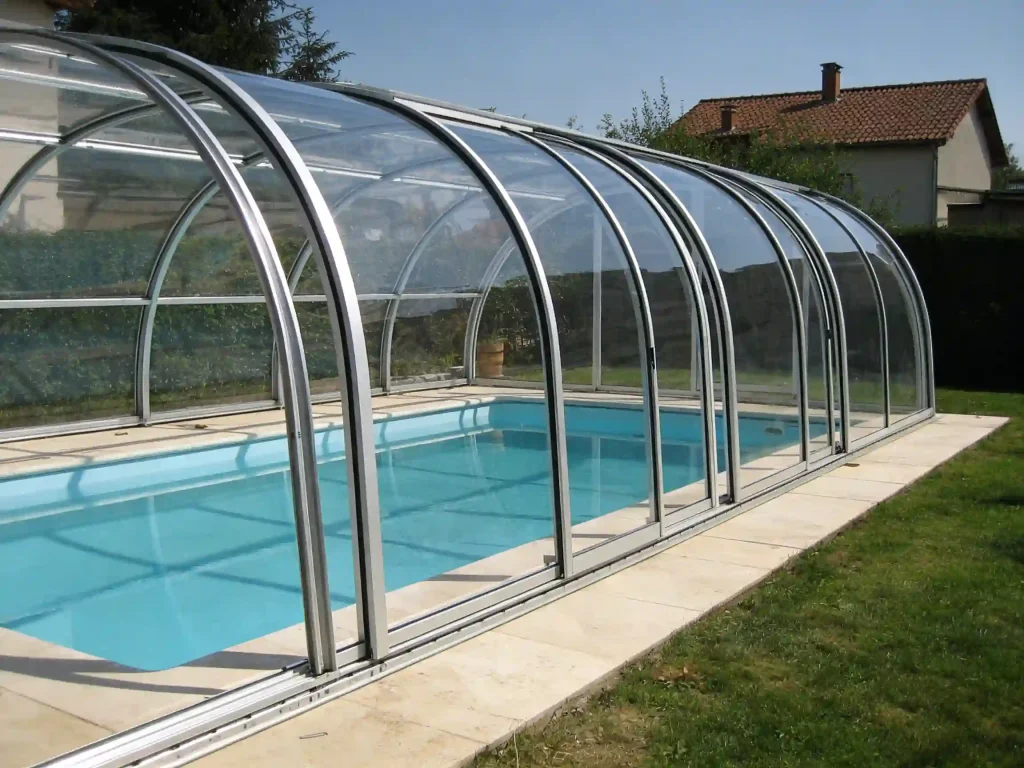
Шаг 12: Заключительная проверка безопасности
Перед сдачей объекта монтажная бригада должна провести окончательный осмотр.
Типичный контрольный список по технике безопасности включает:
- Все винты и анкера затянуты
- Рельсы прочно закреплены
- Ролики плавно перемещаются
- Панели установлены надлежащим образом
- Уплотнения установлены правильно
- Замки работают исправно
- Двери плавно открываются и закрываются
- Концевые упоры надежно закреплены
- Отсутствие острых открытых краев
- Отсутствие нестабильных элементов каркаса
- Отсутствие риска скопления воды
- Эксплуатация пользователем безопасна
В случае моторизированных систем следует также проверить электробезопасность и предельные значения параметров управления.
Шаг 13: Уборка и окончательная сдача объекта
После монтажа и проверки корпус следует очистить и передать владельцу.
Окончательная сдача может включать:
- Очистка панелей и поверхностей рамы
- Снятие защитных пленок
- Проверка внешнего вида
- Демонстрация открытия и закрытия
- Объяснение принципа работы замка
- Объяснение этапов технического обслуживания
- Предоставление чертежей или руководств
- Ознакомление с информацией о гарантии
- Подтверждение согласия клиента
Владелец должен знать, как правильно эксплуатировать, чистить и обслуживать корпус.
Сколько времени занимает установка навеса над бассейном?
Сроки монтажа навеса над бассейном зависят от масштаба проекта, типа навеса, условий доступа к объекту и погодных условий.
Установка небольшого навеса над жилым бассейном может занять всего несколько дней. Установка большого навеса над коммерческим или гостиничным бассейном может занять больше времени из-за сложности конструкции, требований к подъемным работам и необходимости координации с другими работами на объекте.
На время установки влияют следующие факторы:
- Размер бассейна
- Высота корпуса
- Количество подвижных секций
- Длина трассы
- Готовность фундамента
- Материал панели
- Погодные условия
- Доступ к сайту
- Опыт работы с программой установки
- Сложность индивидуального дизайна
Чтобы избежать задержек, фундамент и площадка должны быть подготовлены до прибытия ограждающих конструкций.
Распространенные ошибки при установке ограждений для общего бассейна, которых следует избегать
1. Установка на неровной поверхности
Неровности поверхности могут привести к смещению рельсов и затруднить скользящее движение. Перед монтажом необходимо проверить основание.
2. Неправильная регулировка колес
Направляющие должны быть параллельны и ровны. Неправильная выравнивание — одна из наиболее распространённых причин эксплуатационных проблем у убирающихся навесов для бассейнов.
3. Пренебрежение дренажем
Скопление воды вокруг трассы может привести к долгосрочным проблемам с техническим обслуживанием. Систему водоотвода следует спроектировать ещё до начала монтажа.
4. Чрезмерная затяжка панелей
Прозрачным панелям может потребоваться пространство для теплового расширения. Чрезмерная затяжка может привести к появлению напряжений или деформации.
5. Неучёт воздействия ветра
На открытых участках может потребоваться более прочное крепление и соответствующая конструкция. При планировании следует учитывать ветровые условия.
6. Неучет необходимости доступа для технического обслуживания
Владельцы должны иметь возможность легко очищать направляющие, панели и уплотнители. При проектировании следует предусмотреть доступ для технического обслуживания.
7. Использование неподходящего типа корпуса
Низкопрофильная ограждающая конструкция, высокая ограждающая конструкция и солнечная веранда у бассейна служат разным целям. Неправильный выбор типа может снизить уровень комфорта или удобства использования.
Что нужно подготовить перед установкой навеса над бассейном?
Перед установкой необходимо подготовить следующую информацию и обеспечить соответствующие условия на объекте:
- Размеры бассейна
- Размеры террасы у бассейна
- Фотографии объекта
- Видео с сайта
- Информация о измельчённом материале
- Состояние фундамента
- Направление отвода воды
- Местные погодные условия: ветер и снег
- Предпочтительный тип корпуса
- Направление открытия
- Маршрут доставки материалов
- Электропитание (при наличии электропривода)
- Правила локальной установки
- График реализации проекта
- Контактное лицо на месте
В случае индивидуальных международных проектов четкое согласование всех деталей до начала монтажа позволяет снизить вероятность ошибок и задержек.
Установка навеса над бассейном своими руками или с помощью профессионалов
Некоторые небольшие навесы для бассейнов могут устанавливаться самими домовладельцами, однако большинство ограждений для бассейнов следует монтировать с помощью квалифицированных специалистов или под их руководством.
Рекомендуется обратиться к профессионалам для монтажа, если проект включает:
- Большой размер корпуса
- Выдвижные секции
- Направляющие
- Требования к сильному ветру
- Требования к снеговой нагрузке
- Стеклянные панели
- Моторизованное управление
- Коммерческое использование
- Проекты отелей или курортов
- Сложные условия фундамента
Профессиональный монтаж навеса над бассейном помогает снизить конструктивные и эксплуатационные риски.
Установка навеса над бассейном и планирование затрат
Монтаж является одним из важных факторов, которые могут повлиять на общую стоимость остекления бассейна.
Стоимость может увеличиться в следующих случаях:
- Доступ к объекту затруднен
- Требуется подготовка фундамента
- Требуется подъемное оборудование
- Ограждение большое или высокое
- В комплект входят моторизированные системы
- Стоимость местной рабочей силы высока
- Необходимо внести изменения в систему водоотвода
- Требуется настраиваемая структура
Чтобы получить более полное представление о бюджете, ознакомьтесь с отчетом компании Sunrim Руководство по стоимости остекления бассейна чтобы понять, как размер, материал, конструкция и способ монтажа влияют на стоимость.
Как компания Sunrim содействует реализации проектов по строительству крытых бассейнов по всему миру
Компания Sunrim занимается проектированием и производством индивидуальных навесов для бассейнов, выдвижных навесов для бассейнов, солнечных веранд для бассейнов, выдвижных солнечных веранд и систем наружных навесов для жилых и коммерческих объектов по всему миру.
В рамках проектов по установке ограждений для бассейнов компания Sunrim может предоставить следующие услуги:
- Рекомендации по измерению участка
- Анализ требований к проекту
- Индивидуальный проект корпуса
- Технические чертежи
- Производство алюминиевых рам
- Выбор панели из стекла или поликарбоната
- Конструкция рельсово-роликовых систем
- Рекомендации по дренажу и герметизации
- Упаковка и экспорт
- Руководство по установке
- Удаленная техническая поддержка
- Глобальная коммуникация в рамках проекта
Компания Sunrim может порекомендовать подходящие варианты ограждений с учетом размеров бассейна, местных климатических условий, типа проекта и бюджета.
Если ваш проект является частью более обширного пространства, объединяющего внутренние и наружные зоны, вы также можете ознакомиться с предложениями компании Sunrim Руководство по монтажу выдвижной веранды для получения дополнительной информации о конструкции корпуса и планировании монтажа.
Вывод: Качественный монтаж обеспечивает долговечность конструкции навеса над бассейном
Установка навеса над бассейном — это технический процесс, от которого зависят безопасность, долговечность, защита от погодных условий и повседневная эксплуатация.
Успешный монтаж начинается с точного обследования объекта и надлежащей подготовки фундамента. Он также требует тщательной центровки рельсов, сборки алюминиевой рамы, установки панелей, регулировки роликов, герметизации, проверки дренажа и окончательного приемочного осмотра.
В случае убирающихся навесов для бассейнов плавное скольжение в значительной степени зависит от точности рельсов и правильной регулировки роликов.
Независимо от того, идет ли речь о частном бассейне, бассейне в отеле, бассейне на курорте или коммерческом развлекательном комплексе, профессиональное проектирование и содействие в монтаже помогут обеспечить более высокую долговечность сооружения.
Компания Sunrim предлагает индивидуальные системы ограждения для бассейнов и оказывает техническую поддержку при реализации проектов по всему миру.
Начните реализацию проекта по строительству навеса над бассейном
Планируете установить навес над бассейном в частном доме, гостинице, на курорте или в коммерческом бассейне?
Связаться с Sunrim а также сообщите нам местоположение вашего объекта, размеры бассейна, пришлите фотографии участка, информацию о климатических условиях и требования к ограждению. Наша команда поможет подобрать подходящее решение для ограждения бассейна и разработать план монтажа.
Для регионов со снежным климатом особое значение имеют такие детали монтажа, как крепление рельсов, дренаж и герметизация. Узнайте больше в нашем Навесы для бассейнов на зиму: руководство по снегу.
Часто задаваемые вопросы об установке навесов над бассейнами
Каковы основные этапы монтажа навеса над бассейном?
Основные этапы включают обследование объекта, проверку размеров, подготовку фундамента, монтаж рельсов, сборку алюминиевого каркаса, установку панелей, регулировку роликов, герметизацию, проверку дренажной системы, проверку безопасности и окончательную сдачу объекта.
Нужен ли фундамент для навесов над бассейнами?
Да. Навес для бассейна следует устанавливать на устойчивом, ровном и прочном основании, например на бетонной площадке или армированном фундаменте. Некачественное основание может привести к перекосу направляющих и проблемам со скольжением.
Могу ли я самостоятельно установить навес над бассейном?
Небольшие и простые системы, возможно, проще установить, однако большинство раздвижных навесов для бассейнов следует монтировать силами квалифицированных специалистов или под их профессиональным руководством, поскольку правильное выравнивание направляющих, сборка каркаса и проверка безопасности имеют большое значение.
Сколько времени занимает установка навеса над бассейном?
Срок монтажа зависит от размера бассейна, типа ограждения, готовности фундамента, доступности объекта и сложности проекта. Монтаж небольших ограждений для частных домов может занять несколько дней, тогда как для более крупных коммерческих проектов может потребоваться больше времени.
Что нужно подготовить перед установкой навеса над бассейном?
Вам следует подготовить размеры бассейна и террасы, фотографии участка, подробную информацию о состоянии грунта, направлении отвода воды, данные о местном климате, информацию о предпочтительном типе ограждения, а также сведения о подъезде для доставки материалов и прибытия монтажников.
Почему выравнивание рельсов имеет важное значение для убирающихся навесов над бассейнами?
Выравнивание направляющих влияет на плавность хода. Если направляющие не параллельны, не выровнены и не закреплены надёжно, открывание или закрывание коробки может затрудниться.
Какие материалы используются при монтаже остекления для бассейна?
В конструкциях навесов для бассейнов обычно используются алюминиевые каркасы с панелями из поликарбоната или стекла, направляющие для раздвижных конструкций, ролики, резиновые уплотнители, крепежные элементы, замки и дренажные приспособления.
Влияет ли монтаж на стоимость ограждения для бассейна?
Да. На общую стоимость проекта по устройству навеса над бассейном могут повлиять такие факторы, как доступ для монтажа, подготовка фундамента, размеры навеса, его высота, материал, наличие моторизированной системы, а также сложность условий на объекте.
Предоставляет ли компания Sunrim поддержку по установке?
Да. Компания Sunrim предоставляет рекомендации по измерению площадки, технические чертежи, советы по монтажу и удаленную техническую поддержку для проектов по устройству навесов над бассейнами по всему миру.


